Mailchimp is one of the most popular e-mail service providers out there if you’re a blogger, entrepreneur or shop owner. It’s intuitive and user-friendly, and there are SO many different options and customization’s that you can use to make your e-mail stand out from other businesses.
I highly recommend starting out with Mailchimp if you’ve never used an e-mail provider before. You can create your own custom e-mail templates within Mailchimp, add A/B subject line testing, create welcome sequences, create ads, create campaigns, sync with opt-ins on your website and more!
In this post I’m going to show you a step by step tutorial to sending your first e-mail to your subscribers. This is a very basic e-mail so play with the different content blocks, try different colours and font styles and just have fun with it! Let’s get started on how to send a Mailchimp e-mail:
First, create a Mailchimp account here. You can have a free account up to 2,000 subscribers. Second, import your existing e-mail contacts with a .CSV file or input them manually. Mailchimp can teach you how to do that here. If you’re just starting out with an e-mail list and don’t have subscribers yet, add your business e-mail so you can practice your email designs!
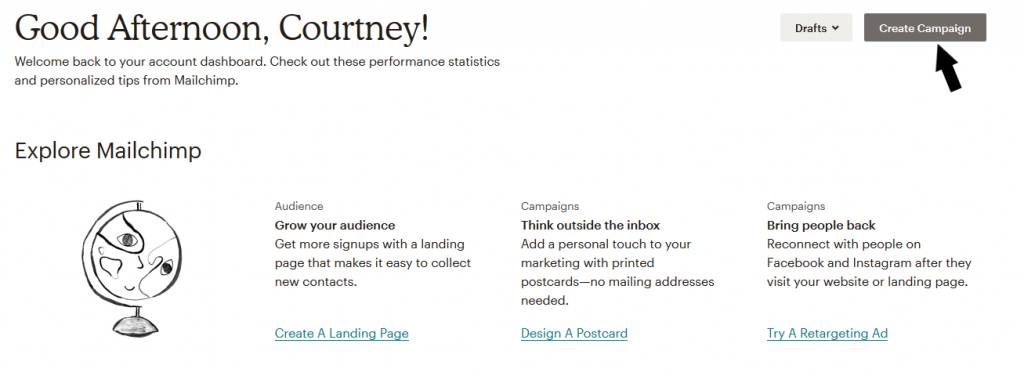
When you first login to your account, you will see the main Dashboard page. Click on “Create Campaign”.
2- A new window will open and click on “Email”.
Keep your email on the default “Regular” tab and type in your e-mail title or name. This you will only see internally in your Dashboard.
Click “Begin”.
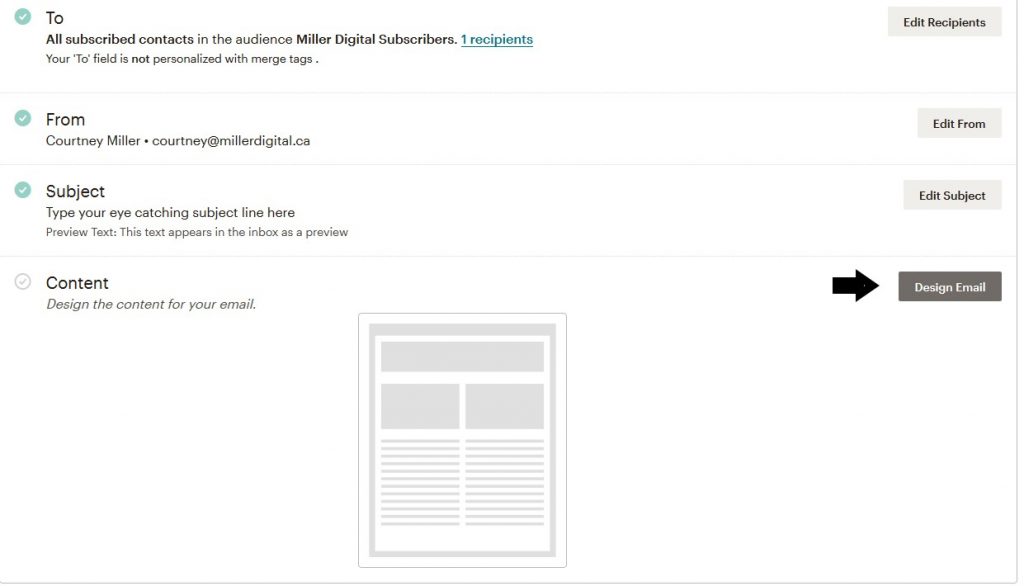
Mailchimp will take you to a main e-mail page that lists out everything about your e-mail. Start with the “To” column first and click on “Add Recipients”.
Remember how you added your contacts already? Hit the drop down arrow and select your audience name.
We are going to send to all subscribers in audience so keep that automatically there under “Segment or Tag”. Hit “Save.”
Now click on “Add Subject”. Choose a subject line that is eye-catching and converts your readers to open them! You can read my post on 50 E-mail Subject Lines that Convert Subscribers and download all 50 subject lines for free here.
Type in your subject line and add a short blurb of text in the “Preview Text” section. This is what your reader will see as the first line of text in their inbox under the subject line when they receive it.
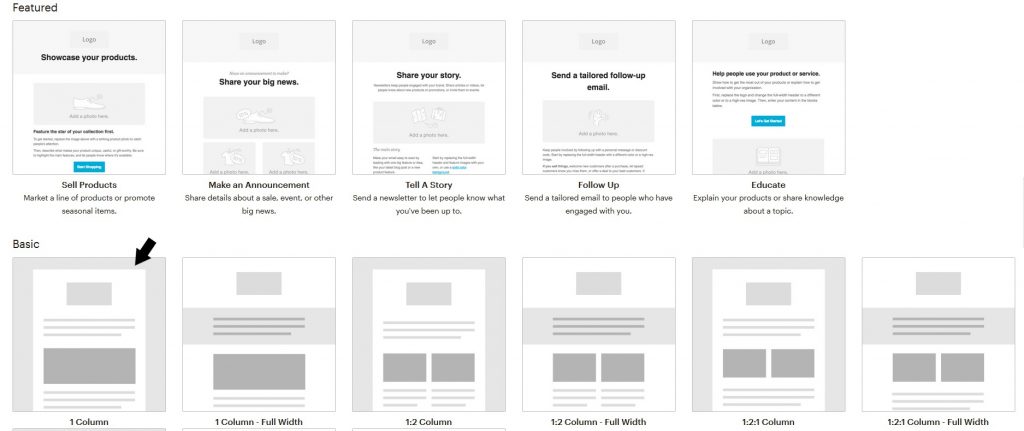
Now your ready to create your e-mail! Click on “Design Email”. Mailchimp has a variety of email templates available for you to choose, I suggest starting with a Basic 1 Column template.
Don’t know what the heck to send your e-mail subscribers? I got you, girl. Read my post on 20 ways to re-purpose content.
Design your e-mail
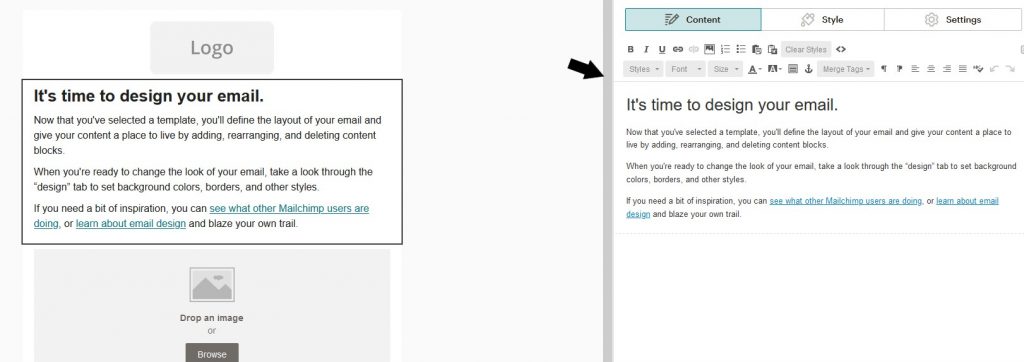
On the left you will see your e-mail design. On the right is where you actually edit your e-mail. There are different content blocks you’ll see on the right which you can just click, drag and drop into your e-mail on the left.
If you want to edit your e-mail, start with clicking on the text box on the left and hit the pencil-looking button. This is the edit block button.
You can duplicate a content block by clicking the second button, the one that looks like a window with a plus sign, or delete it by clicking the trash can. You can move a content block by clicking on the arrows on the left and dragging.
Now to edit your text block! Type in your message into the body on the right hand side. I recommend making your e-mails personal and write them as if you’re talking to that individual person.
It’s also a good idea to include the recipient’s name in the email to make it personal. Type in “Hi”, click on “Merge Tags” and select First Name.
A code of *|FNAME|* will pop up behind it – don’t worry it won’t look like this to your subscriber! It will show their name instead.
You can also change your font size, font style, alignment, add hyperlinks, bullet points or numbers in this area.
If you click on the “Style” tab you can change your font colour, size and line height here as well.
At any time when you are switching between content blocks and editing, hit the “Save & Close” button at the bottom.
Adding Images
To add an image, click on the “Image” content block and drag into your e-mail. Click on the “Edit” button and click “Browse” or “Upload An Image”.
Upload an image from your computer and click “Insert”.
Adding Social Media Icons and Links
See the cute social links at the bottom of your e-mail Mailchimp has generously provided – keep these! Click on the Edit button and a list of different social sites pop up on the right.
Select the drop down to see all your choices. You can add Pinterest, Instagram, Twitter, Facebook, Email, Website and more! Copy and paste your social URL links into each one you want, and delete any by hitting the X icon.
Rearrange the order of your social links by using the gray dots on the left to drag and drop.
Adding a Button
Want your subscribers to click on a catchy call to action button to sign up for your webinar, challenge, read your newest blog post etc? Add the “Button” content block and edit the button text the way your prefer and copy/paste the URL you want your reader to go when they click on it.
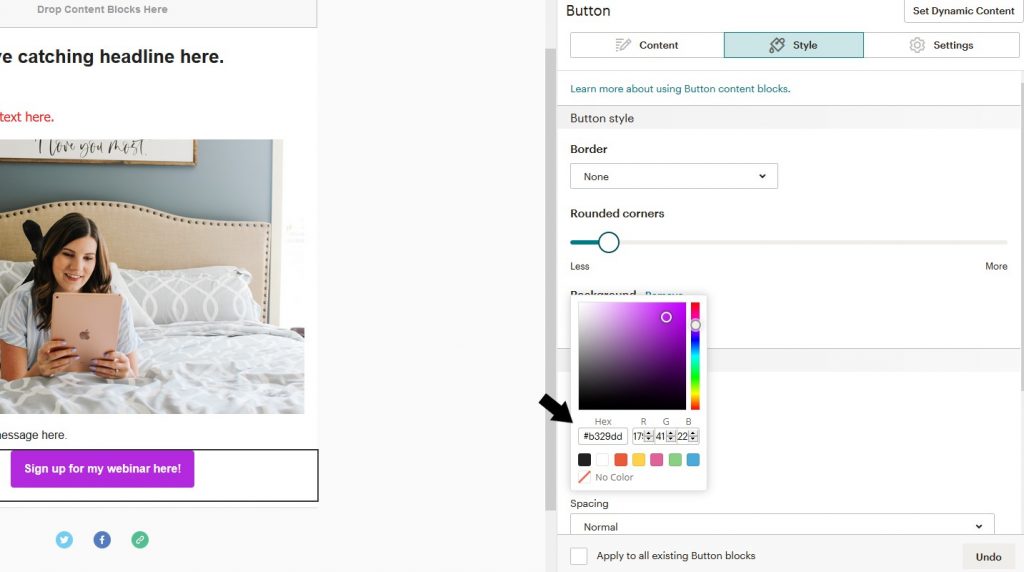
To get custom with your button, click on the “Style” tab and here you can change the colour of your button and even add your own Hex code if you have it to match your brand colours!
Drag the rounded corners button to make the shape of the button edges more square or round.
Send your e-mail
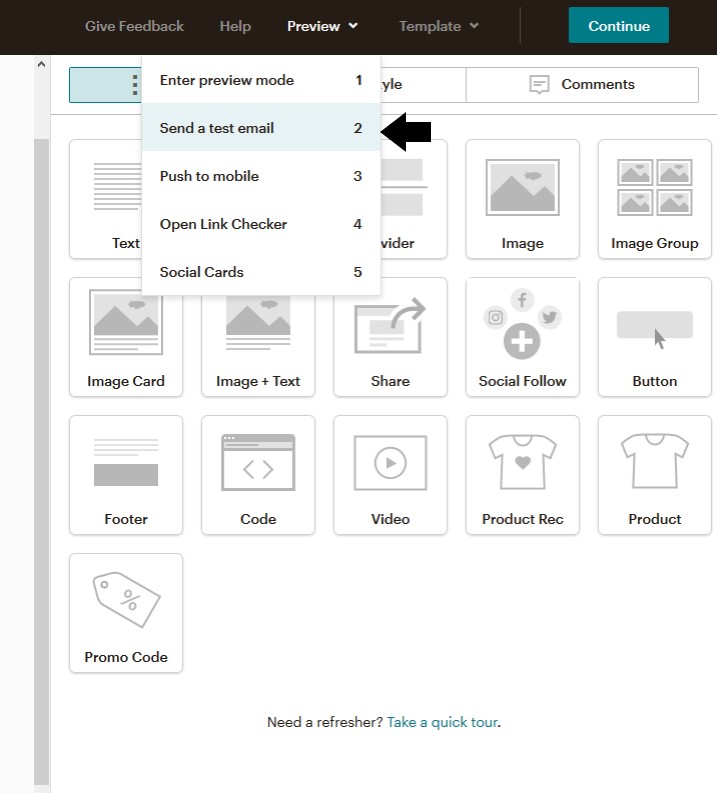
When you’re ready to send your e-mail, using Mailchimp’s handy test feature to ensure everything looks good and formatting works properly. Click on the “Preview” button at the top and select “Send a test email”.
Enter your e-mail address and hit “Send Test”.
Go to your desktop inbox, go to your mobile inbox and view the e-mail. Click on every link and make sure everything is aligned properly. If you need to edit, go ahead and then send yourself another test e-mail.
If it’s to your liking, hit “Continue” in the top right. Now you’re ready to send!
If you want to send out your e-mail right away, hit “Send”. If you want to schedule it for a specific date and time, click “Schedule”.
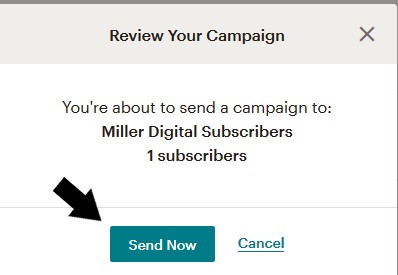
Mailchimp likes to double-check that you actually want to send, so it’ll ask you again and hit “Send Now”!
You did it! You sent your very first Mailchimp e-mail! WOO HOO!
Do you need some help to figure out an e-mail strategy? I got you, girl. Work directly with me for a 1:1 personalized marketing plan.
Review your e-mail results
Once your e-mail has been sent, check back in a couple days by looking at the “Campaigns” tab on your Dashboard.
The email you last sent will show up at the top, and you just need to click “View Report” to view the analytics on the e-mail. You’ll also see your open and click-through-rates. This is the next step in learning to know your numbers to get the best results with your emails!
Let me know below how you found this tutorial helpful, and tell me how your first e-mail sending experience was!